Do you feel like when you finish a figure drawing, something’s “off” about it, but you don’t know why? You’re not alone in this. These mistakes happen to most college-level art students. It is not that they aren’t talented; it’s that, as inexperienced artists, they form poor habits early.
For example, jumping into shading too early or neglecting the structure of their drawings. These small errors can have a big effect and impact future figure drawings. The good news is that these errors can be fixed. We will discuss classroom-tested methods to address these common errors and improve your drawing skills.
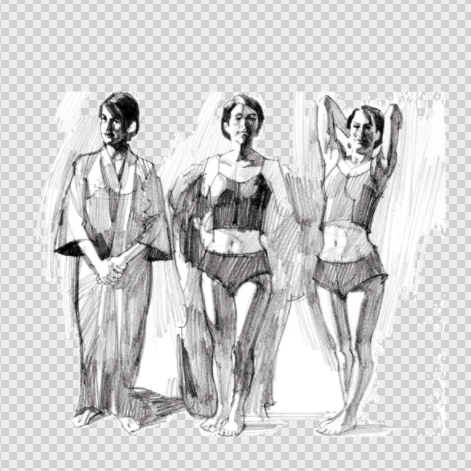
But first, we will discuss common figure drawing mistakes that both beginning and advanced students make, what causes them, and how to correct them. Additionally, we will provide a visual example from Drawing and Rendering THE FIGURE in Black and White and Colour, showing how these corrections are made.
The Most Common Figure Drawing Errors and How to Fix Them
Even those who take their artistry seriously have fallen into the same errors again and again. The most important aspect of your drawing is recognising these issues early.
1. Building Structures Too Early
- How it happens:
You begin shading or adding colors before making a solid structure. While it may appear to be a finished work of art, the proportion and weak form are still hidden within the drawing itself.
- Why does it happen:
Shading gives you a feeling of accomplishment. You will want to see that your page is “alive” with progress.
- Simple fix:
- Build the figures first.
- Lightly outline with a pencil the point to be used for the head, the height of that head, and the main shapes of the figure.
- Add shading after the structure is clear.
Tip: Think of the shading as “previously completed parts of a project,” not “the parts of a project I have put on the back burner until I am ready to shade.”
2. Ignoring Basic Structure
- How it happens:
Many students create contour lines and muscles without first using cylinders, tubes, and boxes for the hip, chest, arms, and legs.
- Why does it happen:
Many students will want to make their drawing appear realistic. At the same time, some will feel building the basic structure is boring. This is because they are excited about having a realistic finished drawing.
- Simple fix:
Break the figure down into basic 3D shapes:
- Hips = Barrel/Tube
- Chests = Flared Tube
- Arms/Legs = Tube/Cylinder
Keep practicing these shapes until you can see them immediately in your figures.
Tip: You cannot build a good structure unless it is already built.
3. Chasing Style before Skill
- How it happens:
You try to execute difficult line drawings and styling without learning how your body is built first.
- Why does it happen:
It’s great to have style, but with no skill, it hides your errors and slows down your progress.
- Simple fix:
- Master proportions, then form.
- As long as the figure looks correct, the style will develop itself.
Tip: Structure first, Personality second.
4. Forgetting Axis and Seam Lines
- How it happens:
If the figure appears twisted or unbalanced, it may appear flat or to be floating.
- Why does it happen:
When drawing the chest and hips, people forget to check the axis and midline.
- Simple fix:
- Lightly draw an axis line down the center of the chest and hips.
- Lightly draw the seam split line vertically in half.
- Check that head, shoulders, and hips follow those lines.
Tip: These lines are there to be used as invisible markers. Once these are drawn, other marks will fall into line automatically.
Why These Mistakes Happen Even at the College Level
You might think these are just beginner mistakes. But even advanced art students make these errors. Here’s why.
1. Getting Excited and Rushing to Finish
It’s great to see your artwork come to life. Colour, shading, and details feel like progress. When you rush, you would skip steps in your foundation, causing mistakes.
- How to Fix
Before adding details, stop and check the basic structure. Think about whether the figure looks like a real person.
2. Bad Habits are hard to Notice
Once you create a habit, it becomes an automatic behaviour. As a result, you may notice yourself skipping tubes, axis lines, and seam lines.
- How to Fix:
Slow down your pace and complete your drawings with each step of the process. Build each figure step by step, using each layer as you build your structure, perspective, shading, and colours.
3. Pressure to Finish Final Artwork
College class assignments and due dates force students to finish their work quickly. This creates stress and causes mistakes to happen.
- How to Fix:
Consider all early exercises as practice to improve your drawing skills and forget about how “perfect” one of your drawings will be. Take your time and pay close attention to detail.
4. Thinking Style Equals Skill
Students are always trying to emphasise their style and sometimes use dramatic poses to make their drawings appear like a good piece of art. However, if a student has an incomplete or badly looking framework under each figure, then using style to improve the look of the drawing will not correct the error.
- How to Fix:
Understand the basics of drawing first. When an artist looks at your completed figures, they will be able to appreciate your style through the quality of your completed drawing.
A Practice Exercise for Improvements in Your Work
One of the best ways to prevent errors from becoming permanent is to practice being aware of them. This book from Doug White contains an exercise about this, which should be completed by following these steps:
Step 1: Select a Point of Reference
Use a live model, photo, or clear book example.
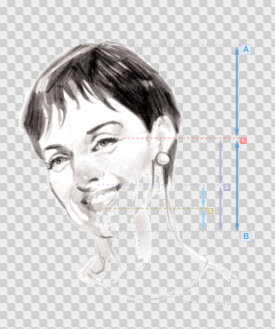
Step 2: Create a Map of the Proportions
Use head height measurement as your starting point.
Using these measurements as your foundation, create basic shapes for the hips, chest, arms, and legs.
Add in your axis of seams.
Step 3: Build Up the Details Slowly
Build up the details of the body parts by starting with the torso, then move to the limbs, head, and finally the facial features. Add light shading only when you have constructed your shapes perfectly.
Step 4: Compare and Adjust
From a distance, check to see if your proportions appear “correct.”
Correct any small inaccuracies before continuing on with the rest of the drawing.
How Does This Work?
- It allows you to identify mistakes as they occur.
- Every time you complete a step, you will gain confidence.
- You receive practice in seeing, not guessing.
Tip: While you are completing the exercise, draw all of your parts as loosely and lightly as possible. Your end goal is to create the correct structure and proportions, not to achieve perfect detail.
Don’t Wait! Detect Errors Early and Develop Your Confidence
Many errors in figure drawing are common. Everyone makes mistakes, including even the most advanced students. The most important thing is to spot errors early and properly practice making easy corrections.
Focus on:
- Making a structure before applying shading
- Using basic geometrical shapes and measuring figures with equal head-height references
- Adding axial and seam lines to help achieve balance
- Taking time to complete every stage of the figure-drawing process
Following these processes will make your drawings more believable, more expressive, and much more confident. You should remember that learning the figures is not about speed. Taking your time and progressing slowly will give you great results with time.